

Today we're going to learn how to make a photo header.
When we're done, we'll have something like this (except yours will have your pictures!):

First, we need to create a new image. Since this header has photos on it, we're going to make it a little taller than the text header. Create a 900x500 image with a 300ppi resolution.

Now, we need to resize our pictures. Go to image -> image size to resize your pictures. In the dialogue box that pops up, set the height for 300 pixels.

Then, use the rectangle selection tool to select the photo. Copy it using the shortcut Ctrl+C.

And then paste it onto the header image that we created earlier using the shortcut Ctrl+V. Repeat these steps for all of your pictures (preferably 2 vertical and 1 horizontal, that's what fits best!).

Once you've pasted all of your images, space them out so that the white space in between them is even.

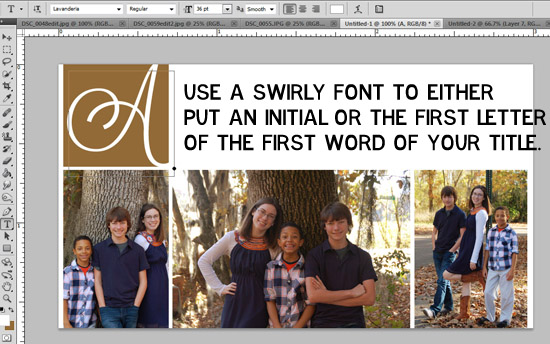
Now, we're going to use the rectangle tool to make a square that is the width of your first picture. Hold down the "shift" key while forming your shape to make it a square. Then, drag the square up just a little bit so that there is a small white space in between the square and the picture (yes, I know that it's no longer a square, but you get the idea).

Use a swirly, cursive font to do one of two things in the square. Either:
A. Put your initial in the square
B. Put the first letter of the first word of your blog title in the square.
You pick. :)

Save this image as "Header" and set it to the side until we put our design together!
We've got one more kind of header to learn! Come back next week to learn how to create a "scrapbook style" header! :)
No comments:
Post a Comment